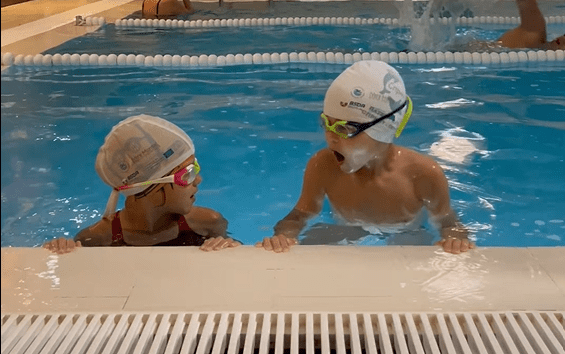
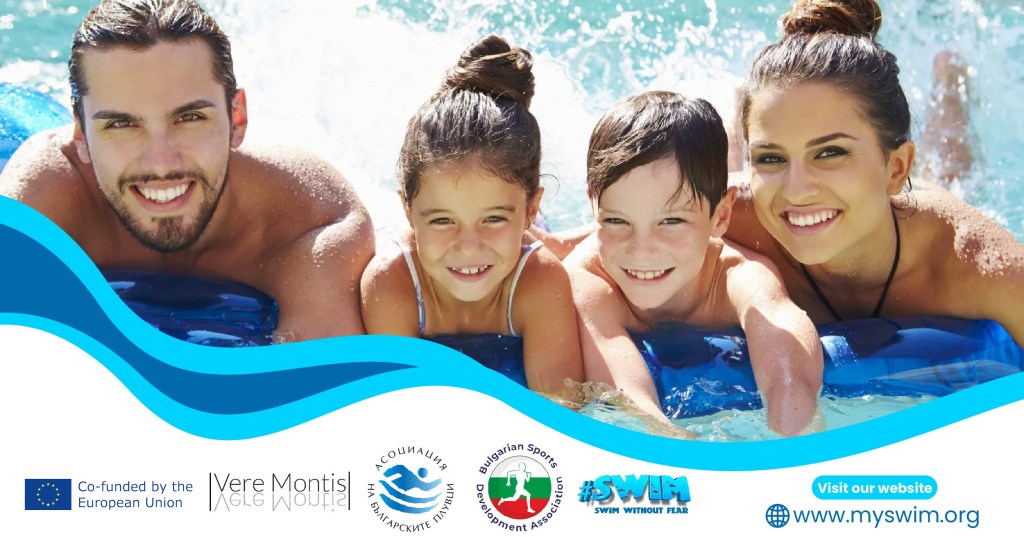
#SWIM! – Swim Without Fear, an initiative funded by the Erasmus+ program, aims to tackle hydrophobia among children by fostering a positive relationship with water. The project endeavors to create a handbook of best practices that will assist parents and organizations in the realm of swimming.
Apart from addressing children’s fear of water, the project focuses on instilling basic swimming skills at an early age. The instructional video offered as part of this initiative is designed to aid parents in guiding their children through exercises to alleviate fear and become comfortable in water. It begins with relaxation techniques in the water, gradually progressing to fun activities such as exhaling underwater. As children grow accustomed to these exercises, they advance to learning correct body positioning, arm and leg movements for various swimming styles, and basic swimming skills.
The video serves as a comprehensive guide for parents, demonstrating step-by-step activities to help children overcome their fear of water in a secure family environment. Not only does this initiative aim to ease hydrophobia but it also emphasizes that swimming exercises stimulate both the body and the mind. Engaging in swimming activities contributes to physical development and enhances cognitive abilities in children. Swimming as an exercise is beneficial as it targets major muscle groups, refining gross motor skills and enhancing coordination.
In essence, this instructional video provides a valuable resource for parents looking to support their children in conquering their fear of water and initiating their swimming journey in a safe, enjoyable, and family-oriented setting.
Find below as well each of the exercises, together with very short instruction how to implement them together with your kids:
STEPS TOWARDS SWIMMING
How to step on bottom
Water is an unnatural environment for people. A person does not have a support in it except the bottom, and beginner swimmers’ movements are unsteady and sometimes erratic. A feeling of fear can arise.
Some of the most important tasks for the child is to gain confidence in the water, to know how to step on the bottom.
Useful exercises for getting used to the bottom is chasing each other in shallow waters, dipping, splashing, playing with a ball, etc.
Learning how to breathe
We recall what the child did over the washbasin or in the bathtub. The exhaling underwater, the ripples and bubbles.
It’s time for gaining more confidence. The child can hold the parent’s hands, and repeat the exercises from the washbasin or bathtub. Start with up to 10 repetitions. Later on, you can do two times of 10.
Exercise figures
Some exercises on buoyancy (the lifting power of water) are an important step towards overcoming the fear of water, the deep, and the unknown. There are various types of figures performed by taking deep breaths and holding the air so that the body remains at rest on the surface of the water.
“Sponge”
It is important to take a deep breath first. The body is curled into a ball, the chin is brought to the chest, and the hands cover the legs below the knees. This way, the body gradually floats to the surface until the child’s back is shown. As the air is released/exhaled, the body sinks (goes down a little).
“Starfish”
This is the second exercise. After taking a breath slowly, the child lies down on the chest with the arms next to the body, while the parent is supporting the kid. When the body is in a stable position, after a few tries, the child slowly spreads the legs first, then the arms to a starfish-like figure. When performed correctly the body floats completely on the surface of the water.
Then the child tries “Starfish”, but this time lying on the back.
It is fun and not scary anymore
It is no longer scary for the child to be in the water. Let the child try jumping up together with the parent somewhere no deeper than half a meter and with safe conditions. Before this, the child should inhale and exhale several times to calm down. Then, taking a deep breath and holding hands the child and parent start jumping from the bottom. First, holding both hands and then only one. Almost the same is the way to teach the child jump (dive) into the water from the edge of a shallow pool.
Try the “Dolphin” jump. The child squats in the shallow part of the water body and jumps up and forward trying to make a slight arc. It would be good to try and reach the parent with hands after the jump, the parent being in front of the child.
It’s time for toys to be included in the fight against the fear of water. For this, you need a still-water surface and good visibility. Drop some favorite toys on the bottom and ask your child to get them back. It’s a good idea if, while groping for them, the child exhales underwater and keeps the eyes wide open. Supervise the little one all the time.
Mom, Dad and Me
It’s time for mom, dad, older sister or brother to get even more involved in the kid’s swimming activities.
Tugged by a parent
Holding the hands pull the child on the surface of the water. It is better if the child exhales in the water.
Diving
Stand in a wide-legged stance at a depth that is just above the child’s waist. The goal is for the kid to dive trying to squeeze under this peculiar “tunnel” several times without touching the parent’s legs.
These exercises will be enough for the first swimming lessons.
Swimming styles
There are four swimming styles. They are used not only in competitions, but also to make the swimming lessons more fun and of better quality.

Crawl is the basic and fastest style.
Backstroke is similar to the crawl, but the body lies on its back in the water, and this allows better breathing.
Breaststroke is the most favored style because you swim with the least effort, and your head stays longer above the water making it easier to breathe.
Butterfly (or dolphin because it resembles the marine mammal). This style is taught last because it is the most difficult to learn and tiring to swim.
In the short time during the holiday, the best thing is to start with learning only the most important elements of two of the styles, the crawl and the backstroke.
Crawl legs movement (dryland practice)
In order for the body to keep in horizontal position on the water surface and float, in addition to filling the chest with air, we must also be able to kick properly with the legs. Let’s start with learning the leg crawl exercises “on dry land”.
The workout is held on the beach or by the pool. The child lies on the chest on a pile of sand, an inflatable cushion, a gymnastic or similar bench. The legs and feet should be extended. They move up and down past each other like a pair of opening and closing scissors. Between 15 and 30 movements should be done.

Legs movement for backstroke (dryland practice)
If the day is not very sunny and hot, it will be good to take a little more time for exercise on land.
The leg movements for backstroke on dry land are very similar to those of crawl. The difference is that the movement is performed upwards with the feet extended and the child lying on the back.
The child sits on the edge of the pool with arms behind supporting the body or lies on a pile of sand. The kid extends the feet and performs a scissor-like up and down movement of the legs.
Crawl leg movement with fixed and movable support in the water
It should be practiced in slightly deeper water – up to 1.2 meters. The child lies on the chest and holds on to a fixed support. This support can also be the parent’s hands (the kid’s arms should be extended, preferably along the surface of the water). The learner begins to move the legs up and down, consistently and evenly. It is important that the legs are not tight, but move freely. The leg kicks should be smooth and relaxed, with knees not bent (or just slightly bending). The feet and toes should be extended straight.

Then the child tries the same exercise but with a moveable support. It can be mom or dad holding and supporting the little one while moving forward. A variation is pulling with a floating pool noodle or a help pole. Initially, the exercise is done with random breathing, with the head held so that the mouth is above the still water.
Backstroke leg kicks with fixed and movable support
Next are exercises for the backstroke leg movement. They are done after the crawl legs exercises have been mastered. They can be done in shallow waters with hands resting on the bottom. The movements are performed with feet and toes extended. The difference between the crawl and backstroke leg movement is that this time the leg is slightly bending in the upward movement, and the downward movement is done with the leg straight.
It is important that the child does not expose the knees and toes above the surface of the water.
The exercises for backstroke kicks are easier and quicker to learn because you are breathing above the water.
The swimming kickboard, a helper of little ones and of champions
After gaining confidence in kicking with a stationary and moving support, it’s time to try the crawl leg movement with a swim kickboard. This aid is great for learning how to swim and is an essential assistant to every swimmer.
A small inflatable ball or cushion is not recommended because it creates a sense of security but can easily slip away and get out of reach. But a swim noodle or a suitable floating toy can also do a good job.
First, the swimming practice with a kickboard should be about 10 meters. The head is above the water. Then, the child tries again, but the face is submerged in the water, water covering the ears. After 5-6 kicks the child lifts the chin up to take a breath.
Be sure the ankles are stretched out and the knees are not too bent. It is also important that when taking a breath, the kicking does not stop.
Finally, the child can try to do a “dart”. In this exercise, the kid jumps forward or pushes off something with feet and tries to reach as far forward as possible with the body stretched out and the arms tucked in and forward, with the head between them.
Arm circles forward (dryland practice)
The child stands in a slightly staggered posture to feel stable. Raising both arms high with palms forward the kid does circles with the left arm. First 15, then 30 circles.
Then the circles are done with the right arm starting with 15, then 30 repetitions.
Finally, circles are performed with both arms forward. First, simultaneously, then alternately.
Arm circles backwards (dryland practice)
Again, in a steady position, the child raises the arms up with the palms facing outwards and does backward circles with the arms. Begin with 15 circles, then 30. First with one and after that with the other arm.
Finally, alternate left and right arms.
The exercise is done properly if the arm moves near the ear when going up, and with a palm close to the thigh when the arm is in a low position.
Arm movement for crawl (dryland and water practice)
The child is in a steady position with the feet a little apart. The upper part of the body is bent forward with the arms raised up and palms facing downwards. The child begins to trace a circle with one hand.
Moving the outstretched arm, the hand should go beside the thigh. Then, while continuing the circle, the palm should be turned outwards and then the arm is brought up again.
At first, the exercise is done with each arm separately.
If done well, a successive arm movement is also attempted.
The same exercise is performed in water up to the waist with an adult observing and supervising.
Arm and hand movement for backstroke (dryland practice)
The child is standing in a slightly straddled posture with arms raised up high and palms facing outwards.
The slightly bent in the elbow arm rotates backwards and down to the thigh and continues the back-forward circle without interruption.
Initially, the exercise is performed with each hand separately, and finally with both hands alternately.
Vacation is over, time to train
Vacation is over! The children’s first steps into “deeper water” and swimming are behind.
– If the children now jump and dive into the water without fear…
– If they find toys, flippers, seashells, objects underwater and calmly dive in and take them out…
– If they can do “sponge”, “starfish”, “dart” and other drills in the water…
– If they can already do all this, the children have learned the first steps towards swimming.
They are now ready for their first swimming training sessions; with which they will fully discover the beauty of this wonderful sport.
And they are not afraid of water anymore!
#SWIM! – Swim Without Fear! is an initiative co-funded by the Erasmus+ program that aims to analyze the relationship between sport and overcoming hydrophobia at an early age in an innovative and different way. The idea to produce this good practical guide was born out of this project, which will be useful for both parents and organizations in the field of swimming. A survey of parents and swimming coaches was conducted for the #SWIM! – Swim Without Fear! project.
Co-funded by the European Union. The opinions and views expressed are those of the author(s) alone and do not necessarily reflect the position of the European Union or the European Commission. Neither the European Union nor the funding body can be held responsible for them.
